networking SunOS 4.1.4
SHARE |
|
 networking SunOS 4.1.4
 |
by Bill Degnan - 09/15/2026 12:48 |
|
# Bring the onboard LANCE Ethernet card online at IP 192.168.1.210
ifconfig le0 192.168.1.210 netmask 255.255.255.0 up # Delete any mismatched old default routes if necessary route delete default 192.168.0.1 # Link your gateway router to open the path to the network route add default 192.168.1.1 1 # Check if data packets are successfully traveling back and forth netstat -i # Verify that the router responds ping 192.168.1.1 ------------- make it permanent if the above works /etc/hostname.le0 add sunsparc10 /etc/defaultrouter 192.168.1.1 add whatever domains you want to vist this way (or just use the IP address): echo "64.62.136.213 telehack telehack.com" >> /etc/hosts echo "192.168.1.1 router defaultrouter" >> /etc/hosts the above is necessary because DNS is not available on my basic version of Sun OS 4.1.4 --------------- save the directions: cat << 'EOF' > /export/home/network_notes.txt === SUNOS 4.1.4 NETWORK REFERENCE SHEET === 1. Temporary Network Configuration (Live Testing): ifconfig le0 192.168.1.210 netmask 255.255.255.0 up route delete default 192.168.0.1 route add default 192.168.1.1 1 netstat -i ping 192.168.1.1 2. Permanent Network Configuration Files: - /etc/hostname.le0 (Contains: sunsparc10) - /etc/defaultrouter (Contains: 192.168.1.1) 3. Local Domain / Host Mappings (/etc/hosts): echo "64.62.136.213 telehack telehack.com" >> /etc/hosts echo "192.168.1.1 router defaultrouter" >> /etc/hosts 4. Testing Commands: ping telehack.com telnet telehack.com EOF then just run cat /export/home/network_notes.txt --------------- make it permanent sunsparc10# echo "192.168.1.210 sunsparc10" >> /etc/hosts sunsparc10# echo "sunsparc10" > /etc/hostname.le0 sunsparc10# echo "192.168.1.1" > /etc/defaultrouter sunsparc10# cat /etc/hostname.le0 sunsparc10 sunsparc10# cat /etc/defaultrouter 192.168.1.1 Reply |
|
|
How Sun assigns SCSI devices |
by Bill Degnan - 09/15/2026 16:11 |
|
If you put a CD ROM drive on the system as device 3 the system will identify it as a tape or CD-ROM instead of a hard drive, but it will fail if you try to boot from it as a system disk.
When you connect any SCSI device to the SPARCstation 10, during startup, the system sends an inquiry command to SCSI ID 3. The device replies with a code that states its exact hardware type: code 0 for a disk, code 1 for a tape, or code 5 for a CD-ROM. SunOS kernel reads that code and assigns the correct software driver to that address: If you change your boot-device variable to point to ID 3 (disk3 or sd0), but you have a tape or CD-ROM plugged in there, the boot sequence fails because the OpenBoot PROM tries to read a hard disk label and boot blocks from Sector 0.A tape drive cannot return disk blocks, and a standard audio/data CD does not have a Sun hard disk partition map.The system stops and throws an error (like "bad magic number in disk label" or "not a block device"). Reply |
|
 WOrking with unknown SunSparc
 |
by Bill Degnan - 09/15/2026 16:24 |
|
probing a sun system
get yourself a SCSI2SD image of SunSpark 4.1.4 and set the device to 0 (not the default of 3) at install on the right-hand drive when facing from the front of the computer. This is a hack to trick the computer into booting something assigned to drive 0. things you can do from the ok prompt: 1. set your external scsi device to address 3 (because by default the system will be expecting something to be there) 2. from the ok prompt: (if hard drive, and fallback to default "disk"): setenv boot-device disk3 disk (if CD rom or similar and then try disk6) ok setenv boot-device cdrom disk (sometimes you have to enter it this way) ok setenv boot-device disk@6,0 disk 3. view changes ok printenv boot-device 4. apply and reboot (one or the other depending on rev of openBoot ok reset-all ok reset Three things can happen 1. drive is not available or error 2. System boot up into SunOS of some sort (expect errors if the external device is from a different computer than the computer being used to probe the drive 3. You get the error, "The file just loaded does not appear to be executable" means OpenBoot successfully communicated with the external storage drive, found a partition structure, and read a file into memory. However, because OpenBoot expected a bootable kernel file (like vmunix or inetboot) containing specific Sun SPARC executable headers (ELF or a.out formats), it stopped and threw this error when it found incompatible data instead. In short, its not a boot device / it's storage media. USING A SERIAL TERMINAL Hopefully your Sun uses 9600/8/H/1 and you can just go about your thing, but I needed to set my Teraterm to 9600/7/1/Even/XON Xoff FALLING BACK TO THE SUN ROM from the # prompt (logged in as root), enter the command init 0 ..if that does not work try the halt command. This will throw you back to the main console (12W video and Sun keyboard), so if you were using a serial terminal you may lose your session. If you can't even get that far, try STOP+A checking expected I/O devices: (from the OK prompt) printenv input-device printenv output-device set SUN OS to always test for SCSI devices reboot -- -r (this tells SUN to reboot and update the boot config). You can also do this from the ok prompt using the boot -r command probing your SCSI chain probe-scsi (use STOP+A from the console to drop to the ok prompt). From the ok prompt you can get back to your OS session by running the go command at the ok prompt. NOTE - My SCSI2SD harddrive, the one with SunOS 4.1.4 is set to address 0. Reply |
|
|
reading Sun tapes |
by Bill Degnan - 09/15/2026 17:05 |
|
if you come upon a Sun tape a modern Linux box may only be able to read the index but fails to recover the actual data. This is due to a mismatch of the file block size and the native format of the ufsdump utility used by Sun.
When a Sun system running SunOS 4.x or early Solaris creates a tape backup, it doesn't use the standard tar format you find on PCs. It uses a specialized utility called dump (or ufsdump). This tool writes raw blocks of data optimized specifically for Sun's UFS file system structure Sun SCSI tape drives (like Exabyte 8mm or Archive Viper 150 QIC drives) default to writing data in 126-block clusters (63,000 bytes) or specific physical block alignments. Modern Linux SCSI drivers expect standard 512-byte or 1024-byte block increments. Ah Ha! So, set your drive attached to a Sun box to address 4 or 5, which is the default tape drive address. /dev/rst0 (rewind tape 0 after running a command) /dev/nrst0 (dont rewind automatically) if you want to skip past the index: mt -f /dev/nrst0 fsf 1 backup a tape: mkdir /export/home/tape_recovery cd /export/home/tape_recovery restore irf /dev/nrst0 (use ufsrestore irf /dev/nrst0 for a newer Sun box) Inside the interactive prompt, you can type ls to see the directories hidden on the tape, add NOTE: You can try this on a linux box to read a Sun tape that can't normally be read: dd if=/dev/nst0 ibs=63k obs=32k | ufsrestore ivf - (assuming nst0. ibs=63k forces Linux to open its buffer wide enough to catch the massive 126-block Sun clusters without crashing the SCSI bus.) Reply |
|
|
probing unknown sun scsi drive |
by Bill Degnan - 09/15/2026 18:04 |
|
first at the # (root) prompt give your computer a place to map the drive
mkdir /mnt/check_drive see if slice g is used: mount /dev/sd0g /mnt/check_drive (if not try a through h) when you get no errors, you found the right slice. next mount the drive mount /dev/sd0a /mnt/check_drive if that works, run a directory ls -la /mnt/check_drive see how much space is left on the scsi drive you just mounted df -k /mnt/check_drive check users ls -la /mnt/check_drive/users look for text files or docs ls -la /mnt/check_drive/etsdoc backup the storage drive to your scsi2SD drive (-rp preserves the original dates): mkdir /export/home/old_drive_backup cp -rp /mnt/check_drive/* /export/home/old_drive_backup/ unmount the drive when you're done so it does not get corrupted. cd / umount /mnt/check_drive power down or whatever, but if you want to do it again: mkdir -p /mnt/check_drive (this may already exist) mount /dev/sd0g /mnt/check_drive ls -la /mnt/check_drive Reply |
|
|
safe power down SunOS 4.1.4 |
by Bill Degnan - 09/15/2026 18:06 |
|
from the # prompt run the command
halt you'll fall to the ok prompt and you can power off safely after that. Reply |
|
|
swapping external drives to test |
by Bill Degnan - 09/16/2026 11:06 |
|
If you're working through a few unknown external Sun drives, the SunOS 4.1.4 system can be used to triage the drives for an initial inspection:
1. Set each drive tested to 3 2. From the # prompt: dd if=/dev/rsd0c bs=64k count=1 | strings | head -n 5 ...if the computer returns something like SUN2.1G, SUN4.2G, or lists specific partition names (like /usr, /export), the drive is a native Sun disk. 3. run the command dumpfs /dev/rsd0g | head if "g" does not work swap in letters a through h until you find it tells your the hardware cylinders etc. this will help you know which drives you can then mount etc. 4. mount -t pcfs /dev/sd0c /mnt/check_drive Reply |
|
|
bare bones GUI for sparcStation10 |
by Bill Degnan - 09/16/2026 12:31 |
|
The command sunview takes you into the GUI. openwin is a newer GUI that you may not have on a base install of SUNOS 4.1.4
Reply |
|
|
adding more drives |
by Bill Degnan - 09/17/2026 22:19 |
|
I have an impressive amount of space for a SPARCstation 10 running SunOS 4.1.4:/ (Root): Sitting comfortably at 24% capacity./usr: Holding at 73% with plenty of space for applications and compilers./home: A massive 1.7 GB space on slice h that is almost entirely empty./external2: A newly formatted 2.1 GB drive at SCSI Target 2, ready to store files alongside the Target 3 array. Whenever I power cycle this machine in the future, the updated /etc/fstab file will map and mount all of these filesystems automatically right at the boot banner without requiring manual setup.I have successfully diagnosed a dead NVRAM battery, calculated hardware sector boundaries, corrected old SunOS 4 terminal alignment traps, and built out a rock-solid vintage workstation array straight from the local console. So there.
sunsparc10# cat /etc/fstab /dev/sd3a / 4.2 rw 1 1 /dev/sd3h /home 4.2 rw 1 3 /dev/sd3g /usr 4.2 rw 1 2 /dev/fd0 /pcfs pcfs rw,noauto 0 0 /dev/sd2g /external2 4.2 rw 1 3 /dev/sd0g /mnt/check_drive 4.2 rw 1 3 Update I realized pretty quickly that the sd0 is from a newer SUN system so I am going to back up the files to the blank external drive assigned to 2, and play around with the files there. I am going to remove drive 3 and save it for a newer Sun I plan to restore in the future. Reply |
|
Resources:

Popular Topics and FAQs
Past Issues:
Before we switched over to a blog format, past page archives here:
Vintage Computer Festival East 3.0 June 2006
Commodore B Series Prototypes July 2006
VOLSCAN - The first desktop computer with a GUI? Oct 2006
ROBOTS! - Will Robots Take Over? Nov 2006
Magnavox Mystery - a Computer, or? Jan 2007
The 1973 Williams Paddle Ball Arcade Computer Game Feb 2007
The Sperry UNIVAC 1219 Military Computer May 2007
VCF East 2007 - PET 30th Anniversary June/July 2007
The Electronic Brain August 2007
Community Memory and The People's Computer Company October 2007
Charles Babbage's Calculating Machine December 2007
Vintage Computing - A 1983 Perspective February 2008
Laptops and Portables May 2008
From Giant Brains to Hobby Computers - 1957 to 1977 August 2008
Historic Computer Magazines November 2008
World's Smallest Electronic Brain - Simon (1950) December 2008 - Feb 2009
Free Program Listings Spring 2009
Computer Music Summer 2009
Popular Electronics Jan/Feb 1975 - Altair 8800 Fall 2009
Early Microcomputer Mass Storage Summer 2010
Kyotronic NEC Tandy
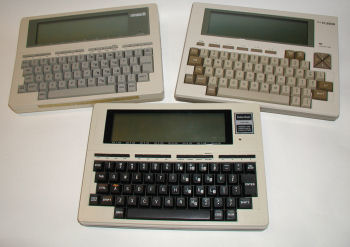
This image was selected at random from the archive. Click image for more photos and files from this set.